The mold remediation process is a complete solution for mold issues that ensures they are solved and removed for good. If you’re tackling a small mold problem and you want a deeper understanding of mold remediation, or if you’re dealing with large-scale mold, choose the right people for the job, you’ll want to read this. In this guide, we’re going to break down the stages of mold remediation, from assessment and containment, to removal and then prevention.
Below is a Mold Remediation Process
Stage 1: Initial Mold Assessment
The first step will be an assessment of the remediation area which will serve the following functions:
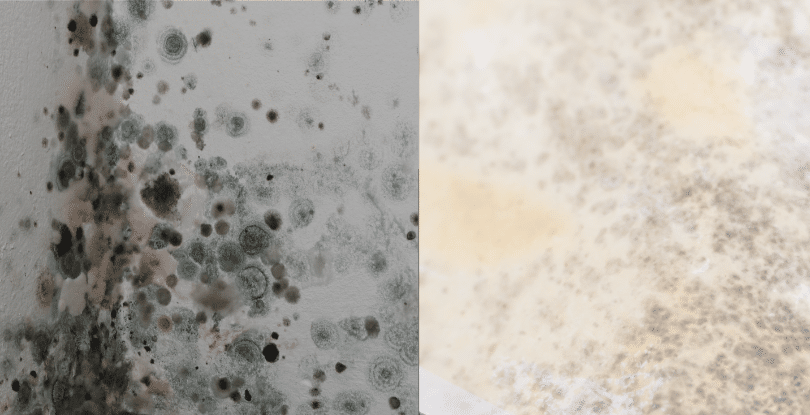
- Visual Inspection: Mold growth will be located and identified visually by the remediation team. Inspection will include areas of visible mold growth and a general visual assessment for the presence of potentially concealed mold growth behind walls, ceilings, and under flooring.
- Assessing extent and severity of infestation: An assessment of the extent and severity of the mold infestation (how large is the affected area and how contaminated is it?) will be made by the remediation team.
- Finding Its Water: mold is a moisture-driven organism. The remediation crew will locate and fix whatever has been making the environment moist, whether it’s a leaky pipe, water intrusion, or humidity issue, and eliminate its return.
- Evaluating Health and Safety Hazards: Mold remediation activities can present occupant and remediation worker health and safety hazards. The assessment will identify hazards and outline safety measures that are required to protect the health and safety of everyone.
Stage 2: Containment
Once that is complete, the next step is to contain the issue. Containing the affected areas keeps mold spores from moving to unaffected areas of the property. Containment measures include:
- Establishing a Containment Barrier: The remediation crew will seal off the work area using plastic sheeting and duct tape. This containment barrier keeps the microscopic mold spores from escaping into other areas of the property.
- Negative Air Pressure: Negative air pressure machines or air scrubbers can also create negative pressure to prevent airborne mold spores from escaping the containment zone. It will also help prevent cross-contamination.
- HEPA Filtration: HEPA filtration devices filter the air so that mold spores and other contaminants don’t escape the containment area, thus allowing the remediation workers to breathe easier.
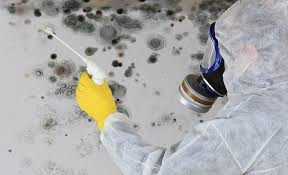
Stage 3: Removal of Mold-Infested Materials
With containment in place, the remediation team can start removing mold-contaminated materials. This usually involves the following:
- Removal of Porous Materials: Moldy materials such as drywall, insulation, carpeting, upholstery and similar materials often need to be removed and discarded. Like flooring materials, they absorb water and rarely clean adequately. 2. Removal of Permeable Materials: Other construction materials such as hardwood flooring, finishes and baseboards are often permeable.
- Cleaning Non-Porous Surfaces: Non-porous surfaces (those without pores, such as metal, glass, plastic and tile) can frequently be cleaned and salvaged using specialized cleaning agents and techniques. The remediation crew will be scrubbed and disinfected to remove mold growths and dissolve them and prevent them from reoccurring.
- Safe Disposal: Materials that have been contaminated by mold should be disposed of safely and according to local regulations. moldy material will be double-bagged in heavy-duty, six-mil plastic bags, transported from the work area to prevent contamination of the rest of the house, and taken to an approved disposal site.
Stage 4: Cleaning and Disinfection
Following removal of affected moldy materials, the remediation team will treat and disinfect the remaining surfaces to remove spores and inhibit regrowth, accomplished by:
- HEPA Vacuuming: A high-efficiency particulate air (HEPA) vacuum cleaner is used to suck up any loose, drifting mold spores as well as any that might be on surfaces, reducing the chance of contamination.
- Antimicrobial Agents: The remediation crew will apply antimicrobial agents and disinfectants to the area of cleaning to kill the mold spores and prevent them from re-growing.
- Drying: If the remediated area is not allowed to dry completely, mold will likely regrow. Thus, the mold remediation team will use fans, dehumidifiers, and other drying equipment to ensure that all surfaces are dry prior to exiting the building.
Stage 5: Prevention Measures
The last step is to develop a plan of prevention so that the chances of mold reoccurrence are reduced by carrying out some of the following tasks:
- Address the Moisture Cause: The remediation contractor will identify any underlying moisture problems that can be causing the growth of mold, such as a leak, condensation or humidity and repair or remediate the moisture issues to prevent a re-occurrence of mold growth.
- 2. Ventilation: Reducing moisture levels through improved ventilation is crucial in preventing mold growth, as well as maintaining good indoor air quality. The remediation team might suggest exhaust fans, improved airflow or dehumidifiers in the home.
- Applying Mold Inhibitors: Mold inhibitors, mold sprays or sealants are sometimes applied on surfaces to help prevent future mold growth. They create a protective coating that keeps moisture and mold spores away.
Do You Have Mold Issues? If You Think You Do, Call Us Toll Free, 1-855-947-6167 – For a Free, No Obligation Quote by a Professional Mold Remediator Near You!