Did you know indoor air pollution can be up to five times worse than outdoor air? This fact shows how critical it is to check your home’s air for mold. Mold spores can float in the air, leading to health issues like coughing and breathing problems. As a homeowner, it’s key to find and fix any mold problems in your home.
Key Takeaways
- Indoor air pollution can be up to five times higher than outdoor air, highlighting the need for mold testing.
- Mold spores can become airborne and cause various health issues, including respiratory problems.
- Conducting a mold test is the best way to determine if you have mold in your home.
- Mold testing kits are affordable, costing between $10 and $40 on average.
- Professional mold remediation services can be costly, with an average price of $2,254.
Get a Mold Test Kit
Mold testing kits are easy to find and affordable. You can get them at home improvement stores or online. These kits have a petri dish that grows mold when it finds spores. Some mold test kits check surfaces, while others test the air. Make sure to read the instructions well to pick the right kit for you.
Types of Mold Test Kits
The Air Check Mold Testing Kit comes with two free test cassettes. It can spot over 20 mold spores, pollen, and dust. You can test different areas in your home, like floors and places with water damage.
For bigger homes or offices, use one cassette for every 1,000 square feet.
The PRO-LAB® MOLD TEST KIT has four ways to test the air for mold. The first two methods show mold in 48 hours. You can pay $40 for lab analysis to know the mold type if it grows after the test.
Where to Buy Mold Test Kits
You can buy mold test kits at home improvement stores, hardware stores, or online. The Air Check Professional Mold Test Kit with Two Cassettes costs $229. The PRO-LAB® MOLD TEST KIT is cheaper, around $40 for the basic kit.
It’s key to follow the instructions of your mold test kit for accurate results. With the right DIY mold testing kit, you can check your home or office’s air quality. Then, you can fix any mold problems.
Prepare the Room for Testing
Before starting the mold test, it’s crucial to prepare the room properly. Close all doors and windows in the room you plan to test for at least 24 hours. This step helps concentrate the mold spores in the room, making them easier to detect during the testing process. By isolating the space, you can ensure you get accurate results from the mold test.
Closing off the room allows any airborne mold spores to settle and accumulate, rather than being dispersed throughout the entire house. This targeted approach is essential for detecting the presence of black mold or other types of mold that may be present.
Once the room is sealed, resist the urge to enter or disturb it until it’s time to perform the actual mold test. This will help maintain the integrity of the air sample and ensure you get an accurate assessment of the mold levels in the space.

By taking these simple preparatory steps, you can set the stage for a successful mold testing process. You’ll gain valuable insights into the indoor air quality of your home or workspace. Properly preparing the room for mold testing is a crucial first step in identifying and addressing any potential mold issues.
Follow the Test Kit Instructions
To use a mold test kit right, you must follow the instructions carefully. This is key for getting accurate mold air sampling results. You’ll need to set up the kit and collect air samples correctly.
Setting Up the Test Kit
Start by taking off the lid from the petri dish in the mold test kit instructions. Put the dish on a flat surface, about table height. Make sure it stays still for 48 hours. This lets mold spores settle on the culture medium inside.
Collecting Air Samples
- Keep the room quiet and still during testing to avoid messing with the air.
- If your kit has an air sampler, set it up and run it as the instructions say.
- After testing, seal the dish or sampler as told and send it for lab analysis.
By following the mold test kit instructions closely, you’ll do the mold air sampling right. This leads to results you can trust. These results can show if there’s mold in your home or building.
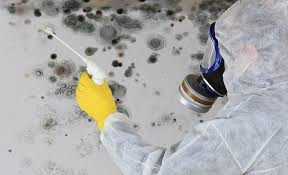
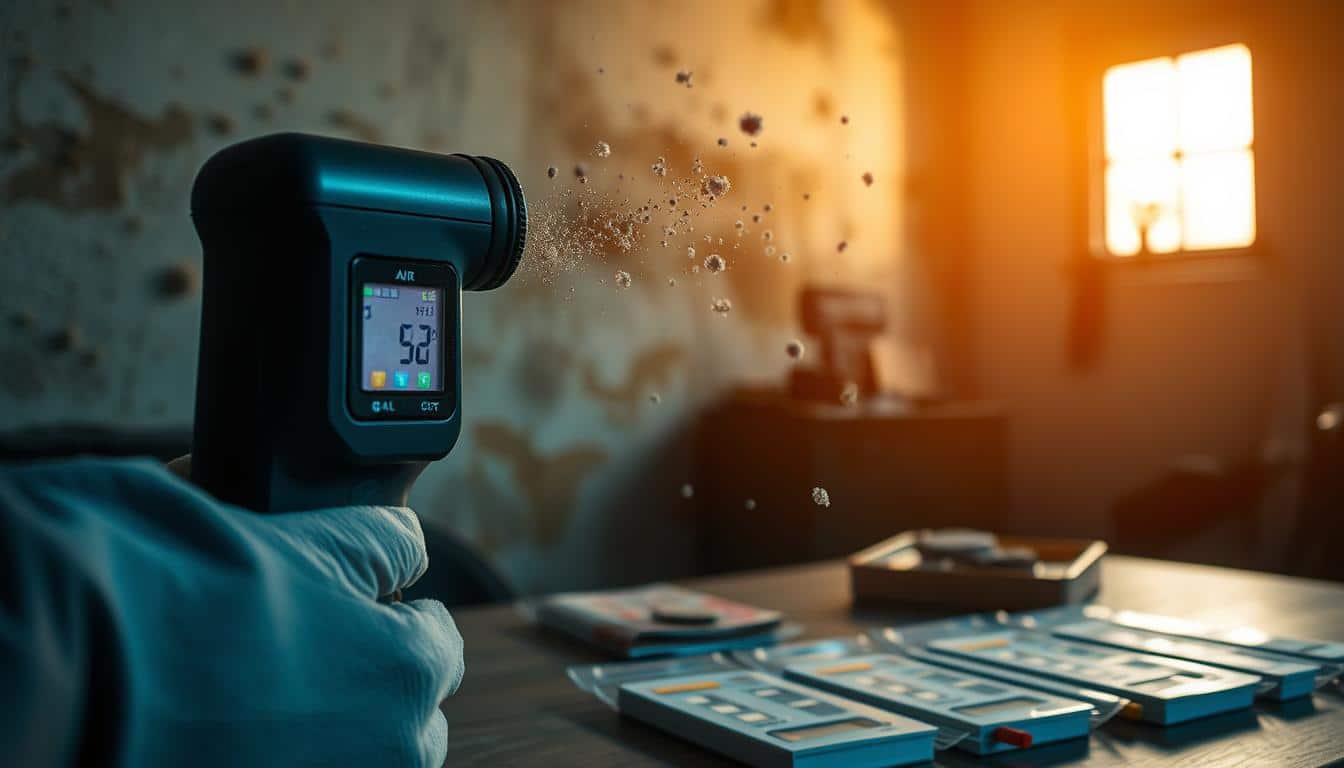
How to test air for mold
Testing the air in your home or office for mold is key to finding and fixing mold problems. Air samples from a mold inspection show what mold types are there and how bad the problem is. This involves using special tools to collect air samples, which are then analyzed in a lab.
Experts use tools like impaction samplers, cassette samplers, and airborne-particle collectors for air samples. These samples are taken from places where mold might be growing. They are usually taken 3 to 6 feet off the ground in living areas. The whole process takes about 10 minutes, but can be quicker if air movement is a concern.
After collecting the air samples, they are sent to a lab for testing. The lab finds out what mold is there and how much is in the air. This info helps figure out how big the mold problem is and how to fix it.
But, air testing alone can’t prove there’s mold. You also need to do visual checks and other tests to really understand the problem. Still, air testing is great for finding mold that’s not easy to see.

In short, testing the air for mold is a vital step in solving mold problems in your home or office. With special tools and lab tests, you can learn about the mold types and amounts. This helps you take the right steps to fix the problem and keep your family or employees safe and healthy.
Leave the Test Kit Undisturbed
After setting up your mold test kit, it’s key to keep the petri dish untouched for about 48 hours. This lets mold spores settle and grow. It’s important to keep the room quiet and still during this mold test kit waiting period.
Keeping the leaving mold test kit undisturbed is crucial for getting good results. Mold is everywhere indoors, and it’s hard to find without testing. By not touching the petri dish, you’ll get a true picture of the mold in your home.
| Mold Test Kit Waiting Period | Recommended Duration |
|---|---|
| Keeping the petri dish undisturbed | Approximately 48 hours |
It’s vital to keep the room still during this time. Don’t open doors or windows, or do anything that could mess with the air. By doing this, you’ll get accurate info on your home’s air quality.
“Indoor air quality can be up to five times more polluted than the outdoors, emphasizing the importance of addressing air pollution indoors.”
Mold testing helps keep your home safe and healthy. By not touching the mold test kit during the waiting period, you’ll get accurate results. This lets you know if you need to take action to clean up the mold.
Seal and Incubate the Test Kit
After you’ve collected the air sample and set up the mold test kit, it’s time to seal and incubate the petri dish. This step lets the mold grow and become visible. It’s how we get accurate results from the test.
Sealing the Test Kit
To seal the test kit, just put the lid back on the petri dish. Use transparent or electrical tape to seal the seam. This airtight seal keeps outside air and contaminants out. It helps the mold grow without interference.
Incubation Period
After sealing, let the mold grow. Place the dish in a dark, quiet spot. Let it incubate for 2 to 5 days. This time lets the mold spores grow and show up. It makes it easier to see what kind of mold you have and how bad it is.
Don’t open the dish or disturb the sample during incubation. Opening it could mess up the mold growth and affect the test results. Just let it sit until the incubation is done.
“Proper sealing and incubation are crucial for accurate mold testing. Following the kit instructions to the letter will ensure you get reliable results.”
By sealing and incubating the mold test kit right, you’re on your way to figuring out how much mold is around. This info is key for making a good plan to fix the mold problem.
Common Areas to Test for Mold
Mold can be a big problem in homes, affecting health if not treated. Knowing where mold often grows is key. This lets you test and fix mold problems early.
Bathrooms are a common place for mold. The warm, humid air from showers is perfect for mold. Check for mold on shower tiles, shampoo bottles, and under the sink.
Kitchens are also prone to mold. Dirty dishes and wet sponges in sinks can cause mold. Look for mold on refrigerators, microwaves, and stoves too.
Bedrooms can also have mold. Moisture from sweat can grow mold on mattresses and windows. Even air conditioning vents can be affected.
Mold can hide in places like behind drywall and under flooring. Signs like a musty smell or discoloration mean you should test for mold.
Regularly checking these areas helps catch mold early. This keeps your family healthy and safe.
Interpret the Test Results
Understanding the results of a mold test is key to knowing your home’s air quality. Whether it’s positive or negative, it’s vital to analyze the findings carefully. This will help you decide what to do next.
Positive Test Results
If the test shows mold, consider a few things:
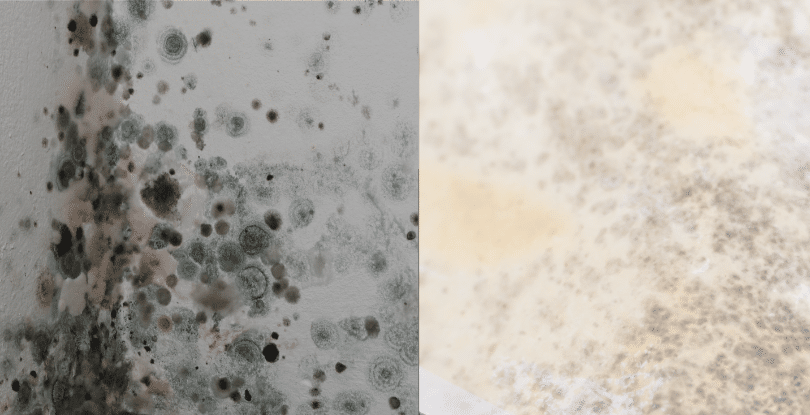
- The type of mold matters. Some, like Penicillium and Aspergillus, are common and less harmful. But others, like Stachybotrys (black mold), can be dangerous.
- The amount of mold spores is important. Less than 500 spores per cubic meter is normal. But more than 500 might need action.
- Compare indoor and outdoor mold levels. If indoor levels are much higher, there’s likely mold in your home.
Negative Test Results
Even with a clean test, stay alert. Mold can hide, especially in places with little air or hidden spots. Here’s what to do:
- Watch for musty smells or signs of mold like discoloration or water damage.
- Think about testing other parts of your home to make sure.
- If you’re still worried about mold, get a professional mold inspector to check.
Understanding mold test results takes careful thought. Knowing what positive and negative results mean helps you keep your home healthy and mold-free.
| Mold Species | Concentration Range | Health Implications |
|---|---|---|
| Penicillium/Aspergillus | Trace – High | Common, generally less harmful |
| Cladosporium | Trace – High | Common, can cause allergic reactions |
| Stachybotrys (Black Mold) | Trace – High | Rare, but can produce mycotoxins and cause serious health problems |
| Basidiospores | Trace – Moderate | Originate from outdoor sources, may indicate entry points |
Consider Professional Mold Testing
DIY mold test kits can be helpful, but the EPA doesn’t recommend any brand. If a DIY test shows mold, it’s best to get a professional mold inspection and testing. Experts can do more detailed tests, find out what kind of mold it is, and tell you how to safely remove it.
Most people spend 90% of their time indoors, making good air quality key. Mold can grow fast, so acting quickly is important. Professional mold inspections use special tools like moisture meters and cameras. They also do air quality tests and DNA tests for a full check.
- Getting a pro for mold inspections is best for a detailed look.
- Make sure the mold inspection service is licensed and insured to protect yourself.
- Having certified staff is important for quality service.
- Knowing what the service can do helps manage expectations.
- Knowing how long the inspection will take helps plan.
Professional mold testing costs $200 to $800 an hour, depending on where you are and how complex the job is. DIY kits cost $50 to $100 per room. But, professional mold testing gives more accurate results and can find humidity levels and give detailed plans for fixing mold.
Think about the cost when choosing between professional mold testing and DIY kits. DIY kits are cheap and fast, but professional mold testing is more accurate. It’s worth it for a healthy home.
Conclusion
Testing the air in my home for mold is key to a healthy indoor space. Using a DIY mold test kit is a quick and affordable way to check for mold spores. But, if the test shows mold, it’s wise to get a professional mold inspection.
Addressing mold early stops health problems and keeps my home safe. This is crucial for my family’s health and my home’s structure.
DIY kits are good for a first check, but professional tests like air sampling and DNA analysis are better. They tell us exactly what mold is there and how much. This info helps us fix the problem right.
By testing and fixing mold, I keep my home clean and safe for my family. With the right tools and expert advice, I can handle any mold issues. This keeps my home healthy for years to come.
FAQ
What is the best way to test for mold in my home?
To find out if you have mold, use a mold test. These kits are easy to find and use. They help detect mold spores in the air.
How do mold test kits work?
Mold test kits have a petri dish with a special culture. This culture grows mold when it finds spores. Some kits test surfaces, while others check the air.
Where can I buy a mold test kit?
You can find mold test kits at home improvement stores and online. Make sure to read the instructions well to choose the right kit for you.
How do I prepare the room for mold testing?
Before testing, close all doors and windows in the room for 24 hours. This helps mold spores collect, making them easier to find.
How do I use a mold test kit?
Each kit comes with clear instructions. You’ll need to open the petri dish, place it flat, and wait for 48 hours.
How long do I need to leave the mold test kit undisturbed?
It’s important to keep the petri dish still for 48 hours. This lets mold spores settle and grow.
What do I do after the initial incubation period?
After 48 hours, seal the dish and let it grow more mold. Place the lid back on, seal it with tape, and keep it dark for 2-5 days.
Where should I test for mold in my home?
Test mold in bathrooms, behind appliances, and where pipes might leak. Also, check under sinks, in ventilation ducts, and under carpet padding.
How do I interpret the mold test results?
If mold grows, your test is positive. Send the sample to a lab to identify the mold. If no mold appears, but you smell something musty, be cautious.
When should I consider hiring a professional for mold testing?
If your DIY test shows mold, or you’re still worried, get a professional to test. They can do more detailed tests and help remove the mold safely.