Did you know vinegar can kill 82% of mold species? This fact shows DIY mold removal is possible. As a homeowner, I’ve found fixing mold in walls is key to a healthy home. Let’s explore how to fix mold in walls and some useful mold removal tips.
Mold in walls usually means there’s too much moisture. This can damage your home and harm your health. The Environmental Protection Agency (EPA) says you can safely remove mold on drywall under 10 square feet yourself. But, bigger problems might need a pro.
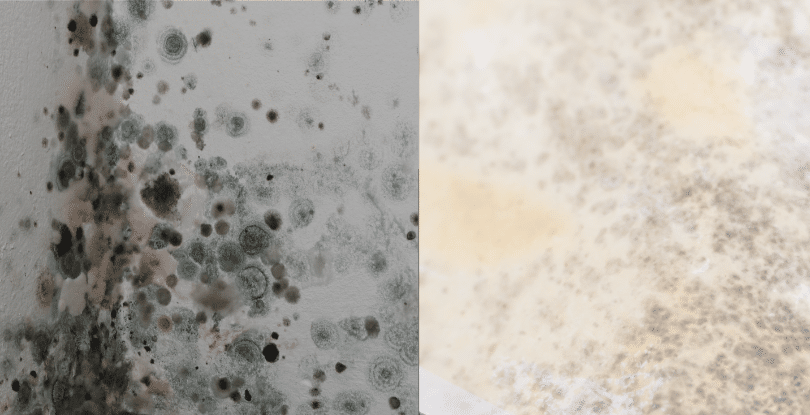
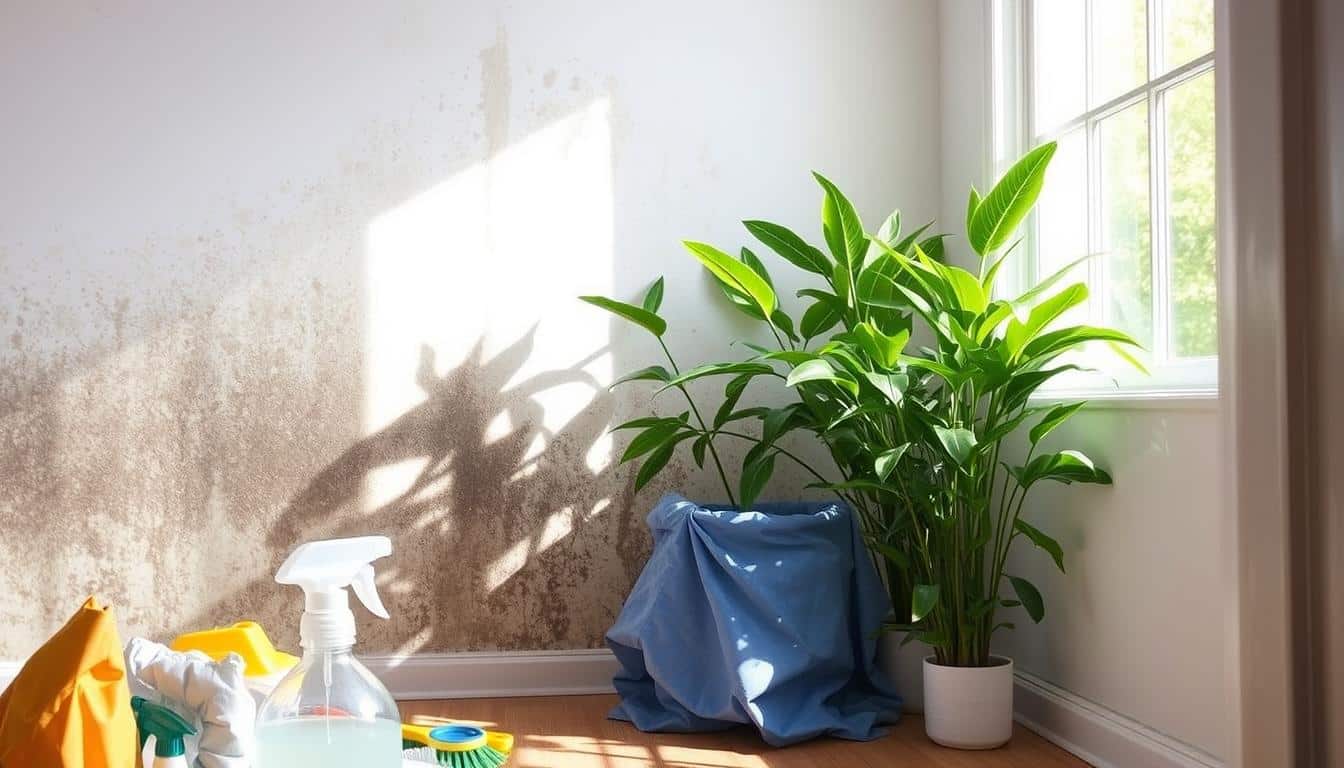
Mold can be tricky to spot. It smells musty and looks like small, patchy spots. If your walls are always damp and you can’t find where the moisture is coming from, it’s a sign of a bigger problem. Our DIY guide will help you remove mold step by step.
Mold removal is not quick or easy. It can be messy and take 1-2 weeks to do right. But, with the right tools and knowledge, you can fix this and make your home healthy and valuable again.
Key Takeaways
- Vinegar kills 82% of mold species, making it an effective DIY solution
- Areas under 10 square feet can typically be handled by homeowners
- Mold appears as patchy clusters and often has a musty smell
- Permanently damp walls may indicate hidden moisture problems
- Mold remediation can take 1-2 weeks to complete properly
- Proper safety precautions and tools are essential for DIY mold removal
Understanding Mold in Walls: Causes and Risks
Mold in walls is a common problem that can harm your health and home. I’ll explain why mold grows, the dangers it poses, and how to spot it. This will help you prevent mold and improve your indoor air.
Common sources of moisture leading to mold growth
Mold loves damp, dark places, especially in walls where moisture is present. It can start growing in 24 to 48 hours and spread quickly. Moisture can come from:
- Leaking roofs or pipes
- High indoor humidity
- Condensation on cold surfaces
- Poor ventilation
Health risks associated with mold exposure
Mold can cause health problems, especially for those with allergies or breathing issues. Mold spores release allergens, irritants, and toxins that can harm your health. Some health risks include:
- Skin rashes
- Upper respiratory issues
- Chronic sinusitis
- Exacerbation of asthma symptoms
Signs of mold presence in walls
Spotting mold early is key to stopping its growth and keeping you healthy. Watch for these signs:
- Musty odors
- Visible mold patches
- Dark stains on walls indicating dampness4
- Damp or flaking drywall
If you think you have mold, act fast. Mold removal means finding, stopping, and removing mold to keep your home safe. For big areas, it’s wise to get professionals to remove mold safely and effectively.
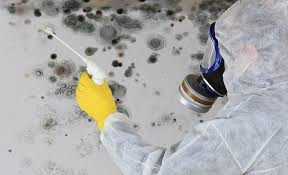
Essential Safety Precautions for DIY Mold Removal
When dealing with mold, safety comes first. I always wear the right gear. This includes an N-95 respirator, rubber gloves, and safety goggles.
Before starting, I turn off power and water. This is done at the electric panel and main water valve. It helps avoid accidents during cleanup.

Keeping mold from spreading is key. I use plastic sheeting and tape to seal off the area. This stops mold from moving to other rooms.
The Environmental Protection Agency says to get a pro for big mold problems. For small areas, I open windows or use fans. This helps keep mold spores from spreading.
- Wear protective gear: N-95 respirator, gloves, goggles
- Turn off power and water sources
- Isolate the work area
- Ensure proper ventilation
Direct contact with mold can cause allergies and spread spores5. By following these steps, I can handle mold safely. This keeps me healthy and stops more mold in my home.
Tools and Materials Needed for Mold Remediation
I’m all set to tackle wall mold remediation. I’ve got all the right tools and materials. Having the right equipment is key for effective mold removal and keeping safe during the process.
Protective Gear Essentials
When dealing with mold, safety is the top priority. I always wear gloves, goggles, and an N95 respirator mask. These protect me from harmful spores. They’re a must for any mold remediation project.
Cleaning Supplies and Equipment
I clean with a mix of dish soap and warm water. Sometimes, I use vinegar or baking soda solutions. I avoid bleach because it’s not good for mold removal. My cleaning tools include:
- One-gallon pump sprayer
- HEPA-filtered shop vacuum
- Fans for drying
- Work light and flashlight
- Prybar and cordless drill
Mold Removal Products and Solutions
For effective wall mold remediation, I use mold encapsulant and biocide. I also have plastic sheeting, painter’s tape, and contractor clean-up bags. To keep mold away, I keep indoor humidity below 45 percent.
Remember, mold loves moisture, so fixing water damage quickly is crucial. With these tools and materials, I’m ready to handle mold issues in my home.
Preparing Your Work Area for Mold Removal
I’m ready to tackle mold cleanup methods to improve indoor air quality. Before diving in, it’s crucial to set up the work area properly. This prep work ensures safety and prevents mold spores from spreading throughout my home.

First, I’ll block off doorways with plastic sheeting and painter’s tape. This creates a barrier to contain mold spores. Next, I’ll cover the floor in front of the affected wall with plastic sheeting. This protects my flooring and makes cleanup easier.
Safety is paramount when dealing with mold. I’ll shut off circuit breakers for any suspected circuits in the wall. This prevents electrical hazards during the removal process. Using a pencil or painter’s tape, I’ll mark the general mold area. This helps me focus on the affected spots.
To avoid damaging hidden wires or pipes, I’ll use a stud finder to identify wall stud positions. This knowledge is crucial when removing affected drywall. Proper ventilation is key for successful mold remediation. I’ll open windows or use fans set to low speed to aid in drying and improve air circulation.
“Preparing your work area thoroughly is half the battle in effective mold removal. It’s not just about cleaning; it’s about creating a safe environment for the task.”
By following these preparation steps, I’m setting the stage for effective mold removal. This careful setup helps protect my health and ensures the best possible outcome for my mold cleanup efforts.
| Preparation Step | Purpose |
|---|---|
| Block doorways with plastic | Contain mold spores |
| Cover floor with plastic | Protect flooring, ease cleanup |
| Shut off circuit breakers | Prevent electrical hazards |
| Mark mold area | Focus cleanup efforts |
| Locate wall studs | Avoid damaging hidden structures |
| Ensure ventilation | Aid drying, improve air quality |
With these preparations complete, I’m ready to move on to the actual mold removal process. Remember, if the mold infestation is larger than a 3ft x 3ft square, it’s considered a major issue, and professional help should be sought. Proper preparation is key to successful DIY mold removal and improving indoor air quality.
How to Fix Mold in Walls: Step-by-Step Guide
I’m here to guide you through fixing mold in walls. This step-by-step guide will help you tackle wall mold remediation effectively. Let’s dive into the essential steps for successful mold removal.
Identifying the Extent of Mold Growth
First, I need to assess the mold situation. I’ll cut a 6×6 inch inspection hole to check how far the mold has spread. Mold can grow quickly if left unchecked, often spreading to the back of drywall. If I spot mold on wood, it might signal a bigger issue requiring professional inspection.
Removing Affected Drywall and Insulation
Once I’ve identified the mold-affected areas, I’ll carefully remove the damaged drywall and insulation. I’ll place these materials in contractor bags for safe disposal. It’s crucial to wear a protective suit to prevent spreading mold spores with my clothing. If the mold is on unpainted drywall, I’ll need to cut out the affected area completely.
Cleaning and Treating Moldy Surfaces
Now it’s time for thorough cleaning. I’ll use a HEPA-filtered shop vac to remove loose mold spores. For treating the surfaces, I’ll apply a mold biocide spray and let it dry. Then, I’ll use a fungicidal mold encapsulant for extra protection. It’s important to note that the EPA advises against using bleach to clean mold. For painted drywall, I can use a DIY solution of vinegar or baking soda.
Drying and Dehumidifying the Area
The final step in my mold removal tips is thorough drying. I’ll use fans or dehumidifiers to remove all moisture from the area. Keeping humidity levels between 40% and 60% is ideal for preventing future mold growth. Once everything is dry, I can replace the insulation and drywall, finishing with drywall compound, primer, and paint.
By following these steps, I can effectively fix mold in walls and prevent its return. Remember, if the mold problem seems extensive or if you’re unsure, it’s always best to consult a professional for wall mold remediation.
Natural vs. Chemical Mold Cleaning Solutions
When dealing with mold, both natural and chemical solutions can work well. Natural options like vinegar, baking soda, and hydrogen peroxide are good for those who want to avoid harsh chemicals. Vinegar, for example, can kill 82% of mold species and is safe for use.
Chemical solutions might be faster but need to be handled with care. RMR-86, a bleach-based product, is great at removing mold stains and killing mold. But, it has strong fumes that you should be careful with. If you prefer natural methods, Benefect, which has thyme oil, is effective against mold.
It’s important to know that different surfaces need different mold cleanup methods. Wood surfaces, for example, need special care because mold loves their cellulose content. No matter what method you choose, fixing the mold’s cause, like leaks or bad air flow, is key to stopping it from coming back.
| Solution | Effectiveness | Best For |
|---|---|---|
| Vinegar | Kills 82% of mold species | Natural, non-toxic option |
| RMR-86 | Highly effective | Removing tough mold stains |
| Benefect | Effective natural option | Those preferring natural solutions |
Whether you choose natural or chemical solutions, make sure to ventilate well and dry everything thoroughly. Knowing the good and bad of each method helps you pick the best one for your mold problem.
Proper Disposal of Moldy Materials
When dealing with mold, getting rid of it right is key. I’ll show you how to handle moldy stuff and follow local rules.
Bagging and Sealing Contaminated Debris
To safely get rid of moldy stuff, put it in big plastic bags. This keeps mold spores inside. For big amounts, wrap them in plastic sheeting first.
When taking out the bags, try not to carry them inside. Drop them out the window instead to avoid spreading mold.
Local Regulations for Mold Waste Disposal
Look up your local rules for throwing away mold. Some places have special rules for moldy stuff. You might not be able to just throw it away in your trash.
Some dumpster services need special care for moldy stuff to stop spores from spreading.
If the mold area is over 10 square feet, call a mold expert. They know how to deal with big mold problems safely.
| Disposal Method | Pros | Cons |
|---|---|---|
| Regular Trash | Convenient | Often not allowed, risk of spreading spores |
| Specialized Services | Safe, follows regulations | More expensive |
| Local Landfills | Proper containment | May require special permissions |
After you get rid of the mold, clean your tools well. This step is important to stop mold problems and make sure your work is done right.
Rebuilding and Restoring Affected Wall Areas
After fixing wall mold, it’s time to rebuild and restore. I’ll show you how to do this, focusing on using materials that resist mold.
First, I add new insulation if it’s needed. Slab foam or spray foam work well in wet areas. They stop mold and keep moisture away.
Then, I put up new drywall. In wet areas, I use mold-resistant drywall. It has special additives that stop mold, perfect for bathrooms and kitchens.
After the drywall is up, I tape the seams and apply compound. I sand it smooth for painting. I choose interior latex paint for its moisture resistance.
Good air flow is key during rebuilding. It keeps moisture levels down, stopping mold from coming back.
| Step | Materials | Purpose |
|---|---|---|
| Insulation | Slab foam or spray foam | Moisture resistance |
| Drywall | Mold-resistant drywall | Prevent mold growth |
| Finishing | Drywall compound, latex paint | Seamless, moisture-resistant finish |
Using these mold-resistant materials and methods, I make sure the walls are fixed and protected. This gives homeowners peace of mind and lasting results.
Preventing Future Mold Growth in Walls
I’ve learned that controlling moisture is key to preventing mold. Keeping indoor humidity between 30% and 50% is crucial for stopping mold growth. Let’s explore some effective strategies to keep our walls mold-free.
Moisture Control Strategies
To prevent mold problems, I focus on controlling moisture. This includes fixing leaks quickly, using dehumidifiers in humid areas, and ensuring proper drainage around my home’s foundation. It’s important to note that mold can grow in walls if severe water damage isn’t addressed within 24-48 hours.
Improving Ventilation and Air Circulation
Good air flow is key to preventing mold. I use exhaust fans in bathrooms and kitchens, and open windows when weather permits. This helps reduce indoor humidity and prevents condensation on wall.
Using Mold-Resistant Materials
In areas prone to moisture, I opt for mold-resistant materials. This includes mold-resistant drywall, paints with mold inhibitors, and moisture-resistant insulation. These materials can significantly reduce the risk of future mold issues.
| Area | Moisture Control Strategy | Mold-Resistant Material |
|---|---|---|
| Bathroom | Use exhaust fan, fix leaks promptly | Mold-resistant drywall, paint with mold inhibitors |
| Kitchen | Use range hood, clean spills immediately | Moisture-resistant countertops, mold-resistant backsplash |
| Basement | Use dehumidifier, ensure proper drainage | Mold-resistant insulation, waterproof sealants |
By implementing these strategies, I can create a healthier home environment and prevent future mold growth in my walls. Remember, keeping the home dry is one of the top ways to ensure a healthy living space.
When to Call Professional Mold Remediation Services
It might be tempting to try to fix mold problems yourself. But sometimes, it’s better to get help from experts. If you see mold covering more than 10 square feet, it’s time to call a specialist. These pros have lots of experience and can handle any mold problem.
Getting a professional mold inspection can cost between $300 and $500. It usually takes 2 to 6 hours to finish. If you also need mold testing, it will cost an extra $200 to $350. DIY kits are cheaper, but they’re not as accurate as professional services. Experts use special tools like HEPA air scrubbers and commercial dehumidifiers for better indoor air quality.
Mold can be very harmful to your health. It can even cause childhood asthma. Symptoms include congestion, wheezing, and fever. If you smell something musty or see mold spreading, call the pros. They can fix the problem in 1 to 3 days, with little disruption to your home. Remember, fixing mold right is key for your health and your home’s safety.
FAQ
What are the common sources of moisture that lead to mold growth in walls?
Moisture from leaks, high humidity, and condensation can cause mold. Outdoor leaks from gutters or drainpipes also contribute.
What are the potential health risks associated with mold exposure?
Mold can cause skin rashes and upper respiratory issues. It’s especially risky for those with asthma, allergies, or weak immune systems.
What are the signs that indicate mold presence in walls?
Look for musty smells, visible mold, dark stains, and damp drywall. These are signs of mold.
What protective gear should I wear when removing mold from walls?
Wear a NIOSH-approved respirator, gloves, safety goggles, and coveralls. Old clothes that can be washed daily are also good.
What tools and materials are needed for mold remediation in walls?
You’ll need a sprayer, HEPA vacuum, fans, and a work light. Don’t forget a stud finder, prybar, and paint tools. Materials include encapsulant, biocide, and drywall supplies.
How do I prepare the work area for mold removal in walls?
Block doorways with plastic and cover the floor. Turn off power and mark the mold area. Make sure ventilation is good.
What are the steps involved in fixing mold in walls?
Start by cutting a hole for inspection. Remove moldy drywall and vacuum. Treat surfaces with biocide and encapsulant. Dry the area, replace insulation and drywall, and finish with compound and paint.
What are the natural versus chemical solutions for cleaning mold in walls?
Natural methods use vinegar, baking soda, and water. Chemical solutions like encapsulants are faster but use them with caution. The EPA warns against using bleach.
How should I dispose of moldy materials removed from walls?
Bag moldy debris in contractor bags and avoid carrying it through the house. Check local rules for disposal, as some areas have specific regulations.
What steps should I take to prevent future mold growth in walls?
Fix leaks quickly and use dehumidifiers in humid areas. Ensure proper drainage and improve ventilation. Use mold-resistant materials in high-risk areas.
When should I consider calling professional mold remediation services?
Call professionals for mold over 10 square feet, as the EPA suggests. They can handle large jobs and provide needed documentation for home sales.